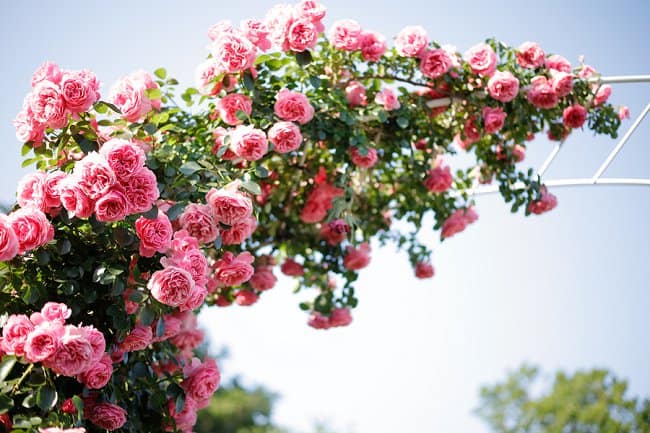
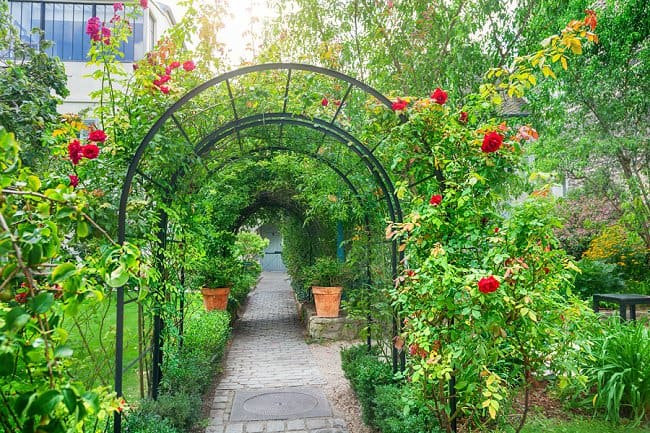
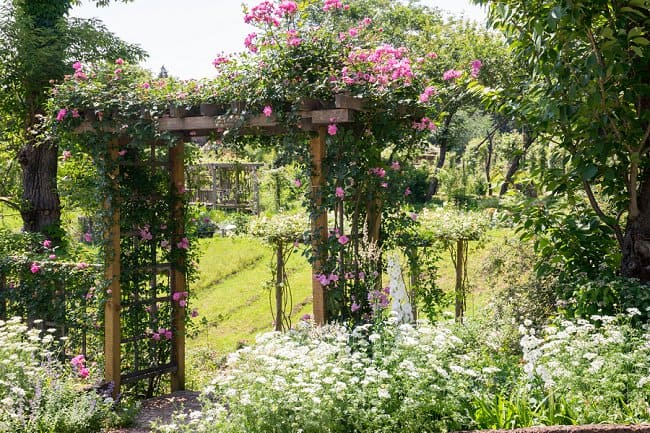
I’ve always loved the idea of having a rose arch in my garden. Rose arches
- Add height to current garden plans and designs
- Provide great attractions for bees (with the right variety)
- Add scent and color to your garden
- Adds elements of traditional, classic, English, and cottage style gardens
- Also can be used for weddings, special occasions – or just to provide beauty to your garden!
I’m always envious of anyone who has a rose arch! For me they feel so decadent, they make me want to picnic nearby while my daughters run around and through them.
So, as my intention is to cultivate my own rose arch, I wanted to share the tips I’ve found on how to grow climbing roses on an arch. You can also check out this post here for some gorgeous arches I totally recommend!
Rose Arch Vs Trellis
The first thing to take into consideration when learning how to grow roses on an arch is the structural element itself. Do you want to opt for an arch, or a trellis?
Your support of choice has to last a long time and cannot be removed later without damaging rose plants – so choose wisely!
An arch is quintessentially a wooden or metal construction that resembles a door and allows passage through. It is neat to use as a garden centerpiece, or as a decorative piece you can walk under.
A trellis is a construction that is often patterned and interlaced, without an arch to it, usually out of a slab of wood which, once secured, does not allow passage but rather is a standalone decorative element.
An arch is a good choice for a garden, a trellis is a good choice for a wall (both indoors and outdoors).
While the size, material and positioning of the arch is entirely up to you and pre-existing elements of your garden, remember that its intention is primarily aesthetic. You might also consider a pergola, or even growing climbing roses along a fence.
Or like I am aiming for – all of them! Well, except maybe the pergola!
Table of Contents
Considerations When Choosing A Garden Rose Arch
You can DIY a rose arch, but I MUCH prefer to buy one! It saves so much time and effort and I figure as I’m going to put the effort into growing the roses and keeping those alive, I’d rather buy one pre-made!
It is important that the arch is stable, balanced and able to outlast a multitude of years, if not decades.
When positioning and securing the arch to the ground, make sure you pick a spot which is in aesthetic harmony with the rest of your garden, and serves a functional purpose as well as being beautiful.
You wouldn’t want to position your arch against a wall (a trellis would be a better pick for that), but use it at a narrower part of your garden to allow passage through.
Make sure that you have an appropriate amount of space around the arch, as the roses that will climb it need to be planted very close to the base of the arch.
Best Roses For Your Garden Arch
How Many Roses Do I Need For A Garden Arch?
The amount of roses you should plant and subsequently train depends on the kind of coverage you want.
If you want thinner, airier coverage, – meaning you can still see elements of your arch itself – you should choose to plant one rose plant.
As it blooms, it will give an open and airy effect. Beautiful blooms will be produced and wrapped around, but at the same time allow for visibility through the arch and make maintenance easier.
If you want full coverage, you should choose to plant two rose plants, one at each corner of the arch. For dramatic effect, you can mix and match different colours and bloom type. As both plants bloom, blooms will intertwine and render you unable to see through to the structural element.
Which rose type is best for rose arches?
Choosing a good rose variety is one of your more important tasks. Not every rose is growable or trainable for a support.
You will need to look for a climbing rose variety, these naturally grow tall, sprout branches which can wrap around structures and are relatively bushy while remaining tall.
Things to look out for when looking for a good variety:
- suitability to your local environment – some roses adore full sun, others prefer partial shade
- size at maturity and whether it suits your chosen space
- resistance to disease
- ability to repeat-bloom
- preference of colour and scent
Most climbing roses (hybrid teas) bloom twice or more every season, first on older canes and then on current season’s growths.
This is called repeat-flowering, and climbers generally repeat-flower from early May through summer.
Old-fashioned climbing roses bloom once, in the summer.
My absolute favourites are those from David Austin – so gorgeous!
Where do I position the plants?
You want to plant your roses very close to the arch, almost underneath it. This will allow for easier and more natural training once the rose is of age and size to be fastened to the arch.
The rose plant will naturally want to open straight up onto the arch if planted in this manner. If you are planting two roses to train up onto the arch, make sure to plant them each at its own corner of the arch.
Where To Position The Arch For Your Climbing Roses
Place your arch in a spot that will ensure your roses will have 6-8 hours sunshine (or daylight at least)! per day, sheltered away from the wind, and with enough room for the roses to grow out, as well as up!
Pre-growing climbing roses in a container
General good practice is to start your rose in a container before it goes into the ground to grow and grace the arch. These will provide more protection for your roses as they sprout, bloom, and curve around the arch.
For this, you will need a big container, about 38 – 40 centimetres in diameter, with drainage holes at the bottom of it.
You can start young roses in a 5 – 12 centimetre pots and upgrade to larger sizes by a pot size or two larger each year as they grow.
Choose a well-draining mix high in organic matter as ordinary soil can introduce pathogens and usually has bad drainage. For good aeration use quality commercial potting mix with perlite – amorphous volcanic glass that has a relatively high water content, visually resembling sand. Mix equal parts perlite and potting mix for a loose and open combination which allows vigorous climbing rose roots to penetrate and spread easily throughout the mix.
Frequently check for moisture content of the soil as the limited volume of soil means more frequent watering than if the rose was growing in the ground. Water needs of the rose plant increase as the rose grows and during summer months.
To check for moisture, dig into the top 2 – 3 centimetres of the soil. If you find it dry, water until water comes through the drainage holes on the bottom of the pot.
When repotting, carefully prune roots to encourage development of a healthy and strong root system.
Planting into the ground from a container
- Secure the arch into the ground as you are advised in the instructional. Make sure it is stable enough to last years and all weather conditions!
- Remove any roots, rocks and weeds you may find in the soil in and around the digging site as keeping them where they are might hinder the development of the roots of the rose down the line.
- Dig a planting hole at each end of the arch for each of the two roses. Holes need to be about twice the size of the pot the rose plant is in.
- Scatter compost and mycorrhizal fungi into the hole and over the roots. Gardeners recommend adding organic Rose-tone to the hole and mixing it well.
- Plant the rose firmly inside the hole and cover. General recommendation is to plant the rose into the ground in the cooler months (April to June in moderate climate).
TIP: When planting the rose into the ground, mind the climate you are gardening in.
If your climate is cold and frost is more persistent, the graft union of the plant should be below the soil line, which will protect it from ice.
If your climate is warmer, the graft union can be a bit above the soil line.
How To Train Climbing Roses
Training the rose plant serves a functional purpose and provides visual beauty to the space. The stems of the plant need to be trained to grow how you want them to on your arch.
How To Deadhead A Climbing Rose On An Arch
Each rose plant has two distinctive parts – a main cane and lateral canes.
The main cane is the one you can follow back all the way to the ground and roots of the plant – the main stem which produces the rest of the shoots and branches.
Keep the main cane intact as much as you can, as from here springs the branches which produce the blooms.
The main cane is where many lateral canes (branches) grow from. They are thinner and smaller in size and can be traced back to the main cane. They produce blooms and can be cut back (deadheaded) when the need arises.
This division might sound unnecessary and it might sound really obvious to differentiate the main cane from the lateral ones, but years after your rose plant is started, the plants might get so overwhelming that you will not be able to tell main from lateral cane by just looking.
A good strategy to avoid accidentally deadheading the main cane is to use small ribbons in two different colours and loosely tie them to the canes, which will help long-term to ease differentiating.
Begin training when long stems appear and you are able to comfortably, without straining the plant, tie them to the arch. These long shoots are what will soon become the main cane – make sure not to cut or remove them under any circumstance.
How To Train The Main Rose Cane On An Arch
You want to train your main cane not to go straight up. If it does, it will only produce lateral canes and blooms at the top.
However, if you train your main cane horizontally or sub horizontally (at less than 45 degree angle), all lateral canes will produce blooms.
During training, you can use zip-ties, stretchable fasteners or garden twine to hand-fasten the canes to the arch or trellis.
Make sure not to fasten too tightly in order to allow growth and expansion of the budding rose. As the rose grows, try and gently arrange branches to motivate growth in a fan shape in order to simplify pruning years down the road.
Rose canes can be weaved around and through the arch, depending on the structural support that the arch has. You can accomplish this by using garden twine every fifteen centimetres to direct and train the cane close to the arch.
Air circulation is very important in order to prevent disease. If you want your rose plant to cover a wall, use a free-standing vertical support structure such as a trellis that gives it a minimum of eight centimetres of breathing room between itself and the wall.
In the first couple of years, focus more on training and less on pruning. Allow your rose plant to come of age for pruning first. This will encourage growth on the bottom, not just the top of the arch, which in turn will lead to a fuller coverage and appearance of the bloom.
How To Prune A Climbing Rose
Pruning helps with prolific rose bloom and it is done for general upkeep of shape and maintenance. It enhances the amount of bloom and helps climbing roses strengthen.
However, you should not prune too soon. First pruning shouldn’t happen before one year has passed and the rose plant has been established, and it is generally inadvisable before at least 2 to 3 years have passed.
The ideal time to prune is in the spring, after first blooms pass. You can also prune in late winter, which will result in an abundance of blooms later in the season. Most climbing roses repeat-bloom, but old-fashioned climbers bloom only once – in summer. If you are cultivating an old-fashioned climber, prune just after blooming has stopped.
Aim to prune about three sets of leaves down on a mature, established rose plant.
Watering Your Climbing Rose
The hassle-free choice for any gardener is to purchase and set up an irrigation system to keep your roses from parching. A good do-it-yourself method of imitating an irrigation system is to take a plastic drinking bottle with two litre capacity.
Cut the bottom of the bottle off, remove the cap and insert it into the ground upside down near the roots of your rose plant.
Pour water in and keep it topped up – roses like a less frequent drink of more volume, rather than a more frequent drink of a lesser volume of water.
Best Tips For Growing A Climbing Rose On An Arch
- In the plant’s first year, tie canes to the support without training when it start to grow and gets long enough to reach support. Give it air and don’t tie it too tightly.
- During first year, tie every fifteen centimetres. Don’t force any specific direction.
- After one year has passed and the plant has been established and grown naturally over the support; select a few strongest canes. Tie them loosely and horizontally to the structural support. This encourages growth of side shoots and blooms.
- Prune in spring, after first blooms have passed. Refrain from pruning before at least two to three years have passed since the rose plant being planted into the ground. Prune if old cane is gray, woody and inflexible, remove dead, damaged and diseased canes. Cut off at the base with sharpened pruning shears, which will help out future growth and promote flow of air.
- Remember to add mulch to the surface, but don’t heap it on. Wood chips are good for this purpose and serve to protect from weeds and retain water better.
- Water the root zone two times weekly, heavily – less frequent and more liberal watering is better than more frequent watering with a smaller amount of water, as roses like consistency.
I hope this post was helpful – leave your comments and questions below! You can also check out this post if you’re ready to buy your own gorgeous arch, and see our top pick! 🙂


